In
the last 50 years Americans have claimed the pizza as the go to party
centerpiece. Once you get the basics of the crust down, just about
anything goes as a topping!
Yes,
you can save time and buy a store brand pre-made pre-frozen disk that
contains God only knows what. But where is the “serving”: the act
of loving creation that brings forth this hand wroth yeasty aroma and
crisp texture, the true historical offering? No you don't have to
make it a perfectly round work of art. You don't have to throw it
spinning in the air (Never attempt this in a kitchen with a ceiling
fan – You don't want to know what that causes)
Most
importantly the process is simple! Really! Make it FUN!

Ingredients
1
tablespoon pure olive oil
1 tablespoon honey
1 tablespoon kosher salt or 1½ teaspoon table salt
3/4 cup warm water
2 cups bread flour (for bread machines) separated
1 teaspoon instant yeast (package rapid rise yeast) This is sold in little envelopes in sets of three
2 teaspoons olive oil
extra:
1 tablespoon honey
1 tablespoon kosher salt or 1½ teaspoon table salt
3/4 cup warm water
2 cups bread flour (for bread machines) separated
1 teaspoon instant yeast (package rapid rise yeast) This is sold in little envelopes in sets of three
2 teaspoons olive oil
extra:
Olive
oil, for the pizza crust
Flour or Cornmeal for dusting the pizza peel (the thing that looks like a shovel for placing and removing the pizza from the oven.)
Flour or Cornmeal for dusting the pizza peel (the thing that looks like a shovel for placing and removing the pizza from the oven.)
A
pizza stone – They are basically cheep and indispensable! Even
if all you ever bake are the cheapest frozen pizzas from the store –
this will help them taste better – also it is the secret for baking
pies that are done on the bottom! Just stick them in the oven before
you preheat! ..I always give it an extra 15 minutes to make sure the
ceramic is heated through.
Keep
your counter top clean and sanitized! You need a fairly big ceramic
bowl for the dough to rise in. Glass will also work but stay away
from plastic and metal.
The
Magic of Yeast:
Yeast
is a living microscopic beastie, that you have to wake up, warm, feed
and then get it to start farting. That rises the flour mixture,
doubles its size and give it the elasticity for you to mold however
you wish!
In
a medium sized bowl, pour in 3/4
cup of warm to the touch tap water (ideally at 105 degrees F.)
Not warm enough, and it doesn’t wake the yeast, too hot and it
kills the yeast. Now stir in the yeast from a single envelope. You
should start to see a reaction.
Notice
in the ingredients, a tablespoon of honey and a tablespoon of oil.
Always measure the oil first, leave the light coating on the spoon
when you measure the honey so it will all slide out! Also any time
you have to open a bottle of sticky liquid, keep a wet paper towel
handy to wipe the cap and the top & threads of the bottle. You'll
never have a lid stick!
Stir
this and add 1 cup of the flour to the mixture. And let sit for a
couple of minutes.

Put
this in the bowl of a stand mixer with paddle attachment and mix on
low as you add the other cup of flour and the salt. This is just to
thoroughly get everything mixed together maybe 1 ½ minutes.
Now
change the attachment to the dough hook that you have first sprayed
with cooking spray. Yes this assumes you have a civilized kitchen
with one of these great mixers. If not, all it means is that your
arms are going to get a good work out by kneading the dough.
With
the dough hook on a speed of no more than 2 or 3, let the machine
knead for about 15 or more minutes. The dough will pull away from the
sides of bowl and climb the hook!

Dough
is affected by the weather so no recipe will be exact. Touch it! Feel
it. If it seems too wet add flour a tablespoon at a time.
If
it feels too stiff, add water a TEASPOON at a time. Poke it with your
finger. If any dough remains, mix it a few more minutes and try
again. You are looking for the stickiness of a post-it note.
Now
let the dough rest, uncovered for 5 minutes.

Pull
out a small piece and push it into a disk. Press this with your
thumb, then slowly stretch this sideways. If dough is ready it will
allow a thin membrane to develop that you can see light through. It
is called the Bakers Windowpane. Tried to get a picture of
this but ran out of hands.
Sprinkle
flour on the counter and your hands place the dough in the middle.
Even if the machine has worked perfectly, you still want to knead it
by hand. Press down with the heel of your palm and push. This
literately gives you the feel of the dough. Keep doing this for maybe
4 or 5 minutes. Then form it into a smooth ball.
Now
the dough gets to grow!
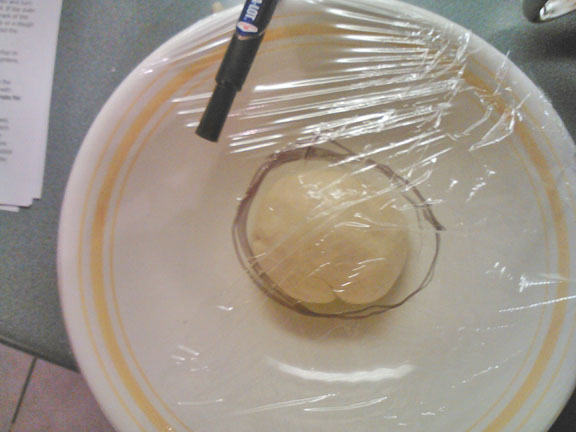
Place
it in a lightly oiled or sprayed large bowl and turn it over so it
has oil all over it. Please go lightly, you don't want it soaking in
an oil bath. Cover the bowl with plastic wrap. You want the dough to
double in size.
Tip:
mark the size with a magic marker on the out side of the plastic
so it will be easy to see how it has grown.
With
the oven off, place a 9 X 13 cake pan full of the hottest tap water
onto the bottom rack, then the bowl on a rack right above and shut
the door.
Allow
just over an hour for the dough to rise. If you have plenty of time
and plan ahead, this can be done overnight in the refrigerator, but
who has the time or the space in there?


This
is a good time to make sure your meat toppings are already cooked.

Now
when ready, take off the wrap and push the dough down with your fist.
This recipe will make enough for two good sized pizzas so cut it in
half and cover the other with plastic warp for cooking latter in the
week, it will keep that long in the refrigerator, and develop an even
greater taste!
Pre-heat
the oven to 425 with the pizza stone already in there.
Flour
the counter and roll out the dough to the size you wish. Turn it
slightly with each roil of the rolling pin. If it doesn't hold and
shrinks back, just give it a few minutes to rest and try again.
Since
I don't have a pizza peel, I just used a cookie sheet that had been
floured. You can use cornmeal for this but it can get gritty on the
bottom. Personal taste.
Note
about the Toppings:
The
biggest mistake amateurs make is to pile on way too much stuff.
Less is more. In fact one of the most popular pizzas in
Italy is the “Margherita” is uses only tomato sauce, thyme and
oregano leaves and hunks of Mozzarella cheese.
I
used ¼ lbs well cooked ground beef, mushrooms and cheese.

Secret
to the BEST sauce:
Yes
there are plenty of jars you can buy that will taste good. However
when the very best is so easy to make why not?
2
Tablespoons extra-virgin olive oil
1
medium yellow onion, diced
2
cloves garlic, chopped
1
(28-ounce) can whole peeled tomatoes in puree (about 3 ½ cups)
½
medium carrot, finely grated
3
or 4 fresh basil leaves, or thyme leaves either works, if using
dried, limit to 1 tablespoon, but fresh is better.
In
a heavy bottom pan or dutch oven with lid, saute the onion until it
starts to turn transparent (a pinch of sugar helps keep the fried
onion smell down). Add grated carrot.
Place
a bowl in the sink for the tomatoes and liquid. With your hands
squeeze each so that they are all squished together. Sounds gross but you have to trust me on this. Set aside.
Smash
the cloves of garlic with side of kitchen knife, this loosens the
skin so it peels easily. Cut the clove lengthwise. If you see a small
line of green sprout starting to grow there, flip it out with point
of knife. Garlic has less than half the liquid onions have so add
these now and stir until they just start to turn a light tan, any
more and the taste will be bad. Add the herbs. Pour the squished
tomatoes and liquid into the onion garlic mixture and lower the heat
to a slight simmer. Put on the lid and let the flavors writhe
together in the darkness. Stirring occasionally and tasting.
If it tastes too sharp or vinegary add a bit more shredded carrot. Let this go on slowly until mixture is reduced by half and thickened. 30 minutes to an hour. Remove any leaves. Let cool and seal it in a jar until needed for up to a week. Trust slave with this. It makes the best sauce. You can personalize it with a touch of red pepper flakes, a touch of sugar, and of course: salt and pepper to taste.

Assembly:
Lightly
dust the “peel” with flour, place the dough on and prick with a
fork all over. Spread no more than 3 or 4 tablespoons of sauce on the
dough.


Sprinkle
on toppings and cover with shredded cheese. Shake it side to side
lightly just to make sure it will slide off onto the pizza stone and
back again. If you like, brush the outer ring with oil so that it
browns nicely.
Slide
it onto the stone and let cook for about 12 minutes, or until the
cheese is bubbly and the crust is lightly browned.
Remove
from oven and let sit for 2 minutes before cutting and serving.

Sliding the pizza onto the stone
Practice!
You will be amazed at how great you feel serving this.
Experiment
with using 1 cup bread flour and 1 cup whole wheat. Try adding herbs
to dough. Try different cheeses, try one without meat, try different
meats, just remember drain them well and if you use bacon it will
make more grease, so use sparingly.

With
each one of these recipes you create, your confidence will grow. That
will improve your performance and Master will be VERY pleased.
Forever
His
socialslave
No comments:
Post a Comment